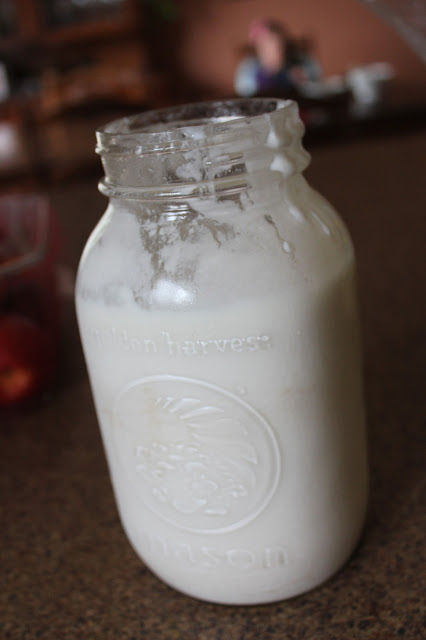
 Yesterday, in what can only be a fit of insanity after my wonderful toddler opted to scream for an hour instead of nap, I decided to hit the kitchen and make not one but four recipes, granola, chocolate oat drop cookies, granola bars and homemade yogurt. On the heels of three days of sweeping out closets, spot cleaning the kitchen floor, cleaning windowsills and a weird trip to the grocery store where I found myself stocking up on Kraft dinner, tuna and licorice, I think we can safely say that at 37 weeks of pregnancy I am in that stage they call "nesting"... Even though the baby's room is only half-finished with walls that need a second coat of paint and, well... a floor, Baby #2 could arrive any time and we'll have a full pantry at least!
One of my favourite breakfasts is granola, yogurt and fresh fruit. It also makes a great healthy snack! The store-bought versions of granola tend to be full of sugar and fillers of all kinds. Even with some sweetener added, homemade granola is full of nutritious goodness when packed with whole grains, seeds and nuts,and makes for a hearty breakfast that stays with you until lunch. Granola is actually very forgiving; using oats as the base you can add your own combination of nuts, seeds, bran/coconut/dried fruit depending on your taste and what you have in your cupboard.
Granola
I usually halve this recipe from Allrecipes.ca, with a few tweaks based on what I have on hand, but this recipe is the simplified version that I use as a base when I make granola now. You just need to keep the approximate proportion of dry ingredients to sweet/wet to help it stick together. Flax and chia seeds both add to the stickiness factor when soaked in an equivalent amount of water for 10 minutes before adding to the mix.Ingredients
3 cups rolled oats
1 1/2 cups nuts and/or seeds
1/2 cup coconut
1/2 cup wheat bran or crushed bran cereal
2 tbsp oil
6 tbsp liquid sweetener (honey, maple syrup, agave syrup)
1-2 tsp ground spices (cinnamon, nutmeg, cardamom)
5 tbsp ground or whole flaxseed (and/or chia seeds) soaked in 5 tbsp water
1 tsp salt
1 tbsp vanilla
3/4 cup dried fruit (raisins, chopped apricots, dried cranberries or blueberries...)
Directions
Preheat oven to 350°.
Toss all the dry ingredients EXCEPT dried fruit in a large bowl, the top with the wet ingredients and flavourings. Combine well and spread evenly on a baking sheet. Use a silicone baking sheet if you have it! It's my new favourite kitchen thing - it makes cleaning pans SO much easier. Bake for about 30-40 mins, stirring every 10 minutes. Remove from the oven and set somewhere to cool. Wait until it has cooled before you stir it, that way you'll have those nice crunchy chunks. Stir in dried fruit and store in an airtight container or bag.
The Yogurt
It's not as hard as you think! You can use a yogurt maker, but here is what I do almost weekly. You can use a lower fat milk, but it makes for a thinner yogurt. Embrace the fat! Also feel free to multiply the recipe if you feel you'll use it up. You can use homemade yogurt as a starter for the next batch, but it will only work a few times before the bacteria seem to weaken or something. Fresh yogurt is the best starter.
Ingredients
1 L whole milk
1 tbsp new plain yogurt (I use Balkan style)
Directions
Scald the milk gently in a medium sized saucepan. Set the timer for about 15 mins at a time so you don't forget about it. Let the milk cool until its still warm/hot but you can still stick your finger in for up to 20 seconds without it being too hot (about 115° if you have a thermometer). Stir in a spoonful of new plain yogurt and pour into a jar or container. Cover and let sit in a warm place for about 8 hours. I put it in the oven with the light on, or you can also put it in a cooler with a hot water bottle. Refrigerate and enjoy!
Note: If you use the oven-with-light-on method, make sure to mark the oven somehow so that you won't turn the oven on to preheat for something else and have the high heat subsequently ruin the yogurt and/or container with a plastic lid... I learned this the hard way. (About 4 times - hello pregnancy brain!) Word to the wise - hang something on the dial or a noticeable equivalent that will stop you in your tracks and make you take out said yogurt before ruination occurs.
Here are two other places that explain how to do it:
David Lebovitz
Chocolate and Zucchini
Today's breakfast - Granola with yogurt and nectarines.


No comments:
Post a Comment