Garden

Monday, June 4, 2012

Chocolate zucchini cupcakes


I realized I need to amp up the sweets on this blog - it's been all meals and gardening lately!  Here is the first in a series of desserts: Chocolate Zucchini cupcakes!  It's a cake recipe that I decided to make into cupcakes and it worked quite well.  I've used this recipe many times from a lovely blog I read, Chocolate & Zucchini (which is aptly named).  This is a delicious, moist cake which manages to hide 2 cups of zucchini among its chocolatey crumbs.  If you're trying to get your kids (or spouse) to eat more veggies, this is a great way to sneak it in!

Chocolate Zucchini Cupcakes

Ingredients:
2 cups flour
1/2 cup cocoa
1 tsp baking soda
1/2 tsp baking powder
1/2 tsp sea salt
1 scant cup brown sugar
1/2 cup butter or olive oil
1 tsp vanilla
1 tsp instant coffee
3 large eggs
2 cups grated, unpeeled zucchini
1 cup semi-sweet chocolate chips

Directions:
Grease a muffin tin and a half (this recipe made 18 cupcakes), and preheat oven to 350°.


Cream the butter and sugar together. 


Add eggs, coffee and vanilla


Mix well - one egg at a time if you can remember :)


In a separate bowl, mix together the dry ingredients.


 Dump 2/3 of the dry ingredients in the butter/sugar/egg mixture.  Place your grated zucchini in with the other 1/3 of the dry ingredients.


Mix up both bowls, coating and declumping the zucchini well. 


Now, the moment you've all been waiting for, stir it all together until just blended.


Now, I forgot to take a picture of the batter in the muffin tin before it went in the oven.  Fill the muffin tins just to the rim and pop in the oven for 20-25 minutes.

Baby interlude...

While they were cooking I went to take a picture of my beautiful sleeping baby's toes.


Back to the cupcakes! When a toothpick comes out clean, take out the cupcakes and let cool for 10 minutes, then pop onto a cooling rack. 


Top with your favourite chocolate icing - mine is this Nutella Buttercream.  I got it off Pinterest, and here is the oh-so-simple recipe:

Nutella Buttercream Frosting

1/2 C butter, room temperature
1 C Nutella
1 C powdered sugar, sifted
1-2 T milk

Just blend with a hand-mixer and spread it on nice and thick.
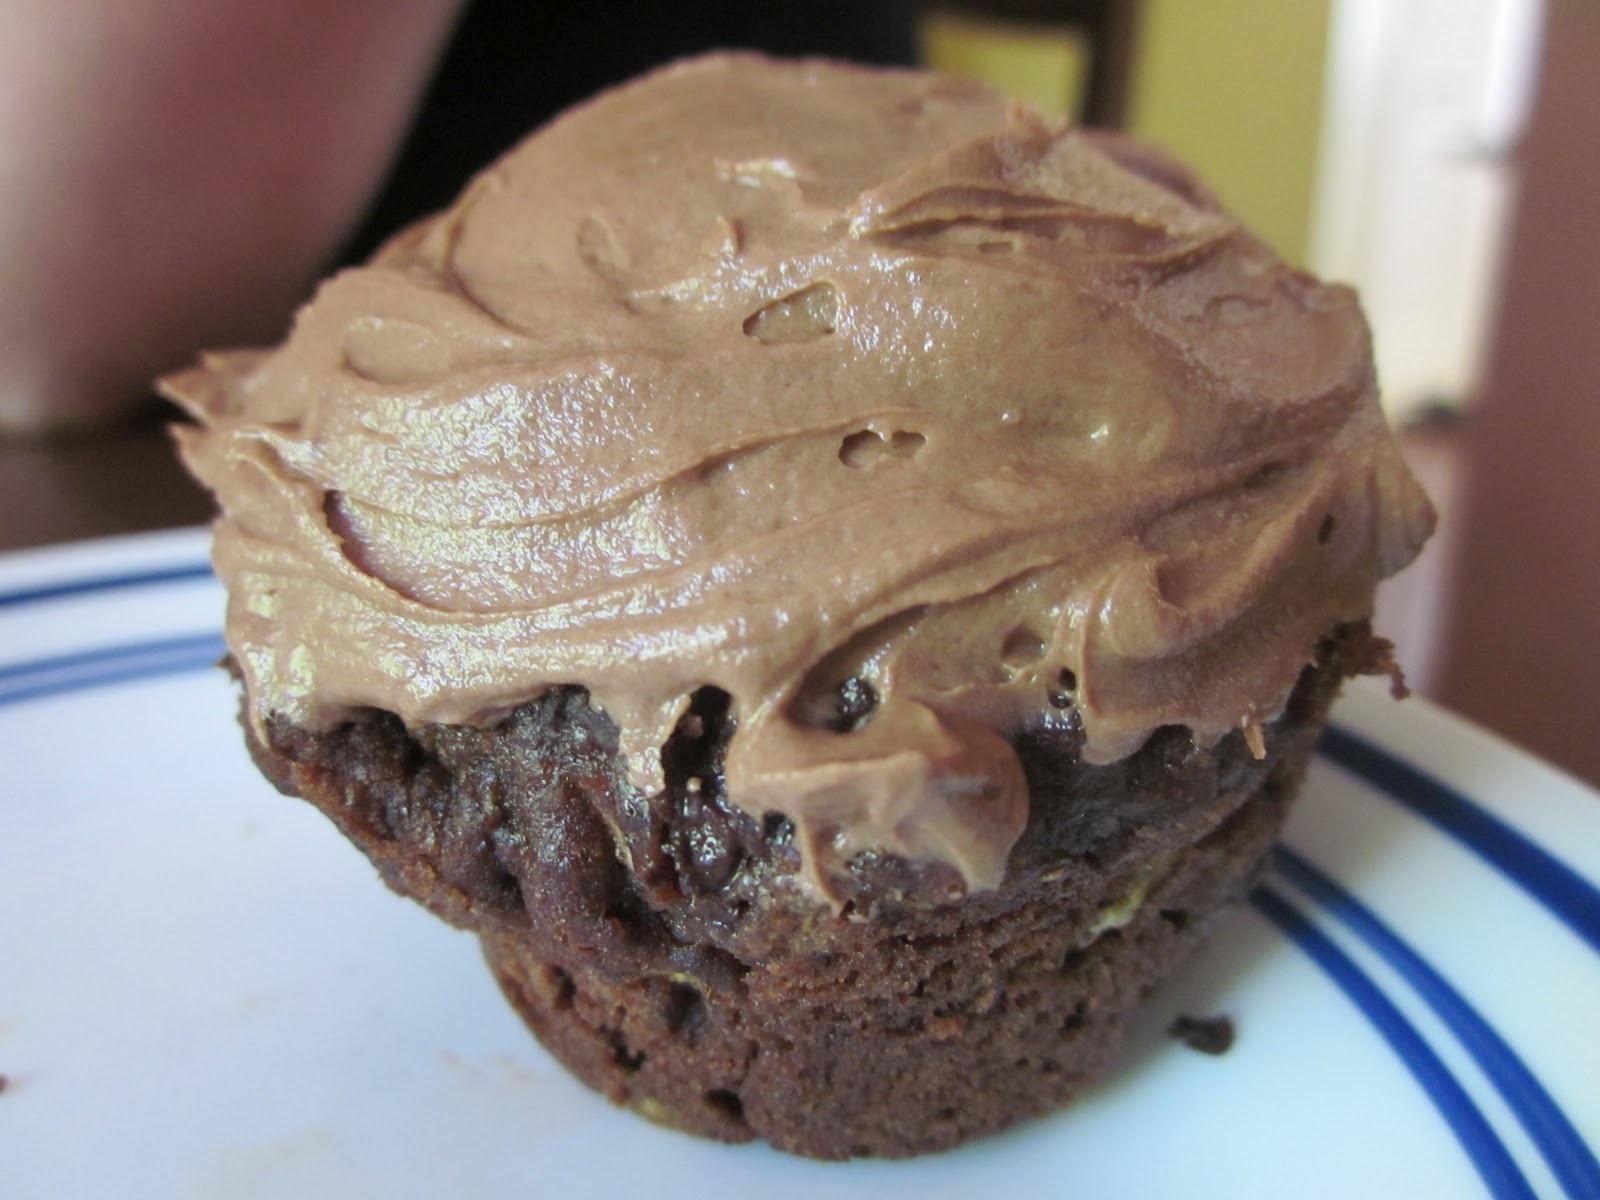

Don't think about the calories in the frosting... you're eating a cupcake with vegetables in it!!

Friday, June 1, 2012

Guacamole


Holé guacamolé!  We used to say that all the time as kids as a term of exclamation.  Now I just say it with my eyes closed when I savour a mouthful of truly holy guacamole.  I take great pride in my guacamole.  My mother-in-law declared she didn't like guacamole and I said, "Here, try mine" and she said "Ooh I like this guacamole".  There you go.

I like my guacamole made with simple, fresh ingredients.  There are so many variations, but I love the combination of spicy garlic, tangy citrus and fresh cilantro with the buttery taste of the avocado.

Ingredients:
A nice ripe avocado
1 tomato (or a handful of cherry tomatoes)
1 lemon or lime
1 clove of garlic
Handful fresh cilantro
Dollop of sour cream or plain yogurt.
Optional: pinch of cumin


Chop everything up and toss into a bowl.  


Top with a dollop of yogurt or sour cream and the lemon juice (or lime), mix it up well. 
I used to purée my guacamole quite smooth, but lately I've been leaving it a little chunky.  Mash to taste.


Eat it up with tortilla chips or pita chips!

Crustless quiche in a skillet

I watched the movie Julie and Julia, and promptly asked for "Mastering the Art of French Cooking" by Julia Childs for Christmas.  Which I got :)  After drooling over the recipes made during the movie, I found the cookbook was full of really rich recipes which were mostly variations of each other relying primarily on quantities of butter, wine or cream.  While I do enjoy some of the key recipes, (crêpes, cream puffs, white sauce...) I am unlikely to cook from it in my day-to-day menu.  That said, the recipe for Quiche Lorraine was the basis for this one, with some adaptations.  Thanks Julia. 


I love quiche.  But I do not love making crusts and I do not love washing tons of bowls and pans.  This recipe uses one pan and one bowl, and no crust!  The flour whisked into the eggs and milk sinks to the bottom and forms a thin crust of sorts.  This is an easy breakfast or lunch for two with enough leftover for one to eat the next day. (You'll have to fight over it)  This recipe is versatile and can be adapted to whatever combination of vegetables, cheeses and herbs you can think of.  One note in the afore-mentioned cookbook was to count about 2 cups of solids (combination of veggies, cheese, meats) and 1 1/2 cups of liquid (milk and/or cream) with 4 eggs for a 9-inch pan (or skillet).  Use your creativity!  Or, just make this recipe.

Crustless quiche in a skillet

*Note: Choose a skillet that can be used in the oven

Ingredients:
Approx. 6 slices of bacon, sliced
1 tomato, chopped
1/2 cup grated zucchini
3 mushrooms, chopped
1/2 cup grated cheddar
Salt and pepper
Handful fresh basil, chopped
4 eggs
1 cup milk
1/2 cup cream
1/3 cup flour

Directions:
Preheat oven to 325°.

Julia suggests you may want to simmer your bacon in water for 5 minutes to get some of the salty-smokiness out. While normally I would relish the smoky-saltiness, my bacon was home-made by my brother (who is in school taking culinary arts) and was particularly smoky and salty.  

So, place bacon in a oven-proof skillet and cover with water.  Bring to a boil and simmer for 5 minutes. 


Drain water,


and return bacon pan and brown. 


While the bacon is browning, prepare your other ingredients, chop the tomato and mushrooms and grate the zucchini and cheese. 


Grab some nice fragrant basil and chop it up fine. 


I threw the mushrooms and zucchini in the with the bacon, just because I felt like it.


While the veggies are cooking up, break 4 eggs in a bowl and measure in whatever combination of milk and/or cream you choose to use (calories schmalories) 


Whisk together with a pinch of salt and pinch of pepper.


Then add the flour and whisk well.


Then pour over the veggies and bacon. 


Sprinkle cheese and basil on top.


 Pop in the oven for 30-40 minutes until no longer jiggly and slightly browned.


When he tasted it my husband exclaimed, "It's so fluffy!" 


With each bite, you never know what combination of flavours you're going to get - mushroom and basil? Bacon and tomato?  Cheese and something?  The combinations are endless. Well, no they are finite and I could calculate them but I choose not to.

Enjoy.


Wednesday, May 30, 2012

Mexican pile-up and love

This summer it will have been 9 years since Jamie and I met, working at a summer camp called Camp Medley.  He worked in the office and I was a camp counselor.  I was seventeen, he was twenty-four, the handsome older guy who was way out of my league.  I had a crush on him all summer.  But, oh joy, he did eventually notice me.  There was some flirting.  

Jamie and I on backwards day at Camp Medley

Then one night we had "The Talk" out on the picnic table under the stars, and floated our way through the last two weeks of camp before we started officially dating.  The first time we held hands was while walking down to the wharf for fireworks on the last night of camp. The rest is history!  

One hallmark of that summer was a meal we had every week which quickly became everyone's favourite: Mexican Pileup.  All the deliciousness of tacos, all the joy and abandonment of a pile of food on a plate.  
For us this meal is a staple of our regular menu and it goes all the way back to that summer when we first fell in love.  Excuse me while I go reminisce...


Ah, young love.  He's my man and I love him even more than I did then.  Like a fine wine, love really does get better with time.  

So, back to the totally un-romantic recipe, making this meal is easy as making rice, cooking hamburger and chopping veggies.  It's essentially tacos but without bothering with trying to keep it all in the taco.  Everyone knows it all falls out anyway...  Its a losing battle. Just make it a Pile. 
Here is what you do:

Mexican Pile-Up


Ingredients:
1 tbsp olive oil (use this spicy oil if you like)
1 onion, chopped
2 cloves garlic, chopped
1 lb hamburger
3 tbsp chili powder
1 tbsp cumin
1 tsp salt
1 tsp black pepper

1 1/2 cup rice
1 green pepper, chopped
1 tomato, chopped
5-6 mushrooms, chopped
1/2 cup grated cheese
sour cream
salsa

Optional:
refried beans
nacho cheese sauce
guacamole 


Directions:
Put your rice on to cook, however you usually do that.  Brown rice is healthiest.
Heat oil in a skillet, toss in the onions. Brown for a few minutes then add the garlic, cooking for about 5 minutes. Add beef and spices and mix well.  Cook until brown and deliciously taco-ey.
While your beef is cooking, chop your pepper, tomato and mushrooms. Oh and grate your cheese while you're at it.

There are those who prefer to put a layer of chips first, but my husband believes he has perfected the art of the pile-up by putting rice first, so it doesn't slide around.  I for one find the chips get soggy underneath and prefer to use the chips to scoop it up.  So, rice, meat, then cheese so it will melt a bit.


Now top with veggies. 


Generous dollops of salsa and sour cream complete this pile of Mexican awesomeness.


Jamie likes to mix his up.  I prefer the un-sullied look of a clean pile.  This really is a subjective science, but a science nonetheless.

Enjoy with tortilla chips or homemade pita chips like we did the other night!

Monday, May 28, 2012

Garden Project: The Great Outdoors

I have plants in my garden!  (I say it with the same pomp and circumstance as one would say "man has walked on the moon!") Remember those teeny, tiny little baby plants that I started indoors two months ago?  Well they have grown into teenagers who have just left home to start life on their own in the great outdoors.  It is so exciting to watch them grow big and strong, all from a little seed!  The miracle of growing things never ceases to amaze me.  

About a month ago we started planning our garden.  After much thought I decided to bite the bullet and build raised beds.  Planting in a raised bed minimizes weeds and gives more yield per square foot, and I thought we might as well start this thing off right. 


We bought 8x8 hemlock planks which my dad and husband made into these lovely beds.  

This is what my backyard looks like.  Four beds measuring 4x8 feet, with mulch in between.  
Recipe for my soil:  1/3 empty soil from the garden centre store
                              1/3 free aged manure from a friend
                              1/6 bagged potting soil
                              1/6 random organic matter laid down last year (seaweed, grass, hay, etc...)

Let's hope the plants like this particular blend. 

Here is what I have so far: 


The basils have since made it into the garden, but grew nicely indoors up until a few hours ago.


 Can't wait to have me some fresh basil and tomatoes from the garden!


Lovely lettuce.


Mini spinach 


Kholrabi (if you've never heard of it, check it out)


About 12 tomato plants! Both normal and cherry tomatoes.


Teeny tiny cherry tomato


 Radishes

 Carrots


Beets


9 little hot pepper plants.


Can't wait to make some spicy deliciousness with these peppers!

This is a half-barrel that I found in the woods and filled with soil to plant my peas.


Climb, little peas, climb!


Stay tuned, soon there will be edible things to take pictures of before I nom them all!

Wednesday, May 9, 2012

Chia sprouts

When I used to hear the word "chia", first I would think of chia pets, then I think of the natural foods section of the grocery store, where you would find organic chips and acai berries.  It was when I was looking for an egg substitute I came across these spunky little seeds which it turns out you can put in just about anything and jack up the healthiness.  Chia seeds have the unique ability to make liquid around them turn gelatinous, or more specifically (here's a fun word) mucilaginous, which is what makes them an ideal substitute for eggs. They have been touted as a new superfood because they are packed with omega-3 fatty acids, tons of antioxidants, dietary fiber and calcium.  They can help you lose weight, give you more energy, the whole bit!   Apparently they absorb some of the liquid in your stomach and help to slow down the digestion process, and help to carry out toxins as they go.  Read more about them here.

So how do you use these little suckers?  You can toss a tablespoon in a smoothie, on your cereal, in salads... the list goes on.  I stir in a few tablespoons in a glass of fruit juice to add some pizazz. The great thing is you don't even notice them because they're smaller than a raspberry seed. 

Here are a couple recipes using chia seeds:
Substitute for 1 egg: soak 1 tbsp chia seeds in 3 tbsps water

Last week I tried sprouting chia seeds. Sprouting something gives it that extra nutritional punch that comes with eating something fresh and living instead of dried.  Here is what you do: 

Lay a paper towel on a plate and get it nice and wet.  Sprinkle on 1 tbsp chia seeds, well spaced out. (Unlike mine)


Cover with another plate until they have begun to sprout, then put in a bright window. Make sure the paper towel stays wet. 
Day 1 - See the jelly-ness?

Day 3 - I try not to think of how much they look like tadpoles...
Day 5

Day 7 - Teeny tiny microgreen chia sprouts!

Once the leaves are green, just take some scissors to them and snip them above the root, and add to a sandwich, wrap or salad.  (Toss the paper towel in the compost)
  
I did find these a bit bitter on their own, but when added to a salad they just added texture and flavour to the whole thing.